So you just got started with Microsoft’s OneNote?
You know that it’s for taking notes but you don’t know much more. You’re wondering why it should be your primary note-taking and information-storing tool. If I’m right, you came to the right place!
I’ve been using OneNote as my main information storing tool for work and personal life since it was first introduced back in 2003. That’s a really long time and fair to say, long enough to know what I am talking about. Fast forward to present day and now I own a business that revolves completely around OneNote – We provide professional-quality OneNote templates for people who want mo make their lives a little more organised. Download our FREE Templates
It’s our mission to use OneNote to help people bring organisation and productivity to their lives without the associated stress.
In this overview, we will look at what you can do with Microsoft’s OneNote and at the end I’ll share some of the most useful tricks I have picked up throughout my own journey so you can start using OneNote like a PRO in no time.
The Basics
OneNote is somewhat like a virtual filing cabinet. You organise all your content in one simple location to make your life more organised and therefore easier. But filing cabinets are not as practical in a modern world that is moving away from printed information – plus they look really ugly!
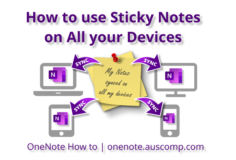
The beauty of OneNote is that your paperless notes won’t ruin the environment and they don’t weigh a thing, so you can take them with you anywhere. All your notes stored in the cloud which means you can easily access them anywhere and on any device so you will never lose a note again, and if you do… you can just search for it in the search bar -> More on that later.
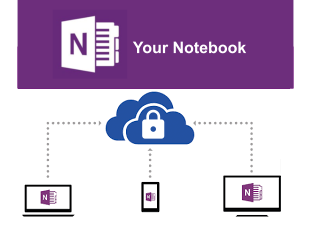 OneNote is optimized for consistent performance across all operating systems. This is good because no matter what device (or devices) you have in your life, so long as they can connect to the internet, you (or anyone you have shared your notes with) can access them anywhere. This seamless device switching and content sharing is what makes OneNote so attractive. In addition, you can be assured that your data is safe and secure because OneNote is part of Microsoft 365’s digital integrity framework – Read more here about your privacy.
![]()
![]() In addition, you can be assured that your data is safe and secure because OneNote is part of Microsoft 365’s digital integrity framework – Read more here about your privacy.
In addition, you can be assured that your data is safe and secure because OneNote is part of Microsoft 365’s digital integrity framework – Read more here about your privacy.
So how do you get it? Well, there are actually two versions of OneNote – OneNote 2016 which is FREE right here or installed as part of Microsoft 365 (formerly Office 365). The newer version, OneNote for Windows 10 (simply called “OneNote”), comes pre-installed on Windows 10 – hence the name. To get it on any other operating systems, you can download it for FREE from the Microsoft Store, App Store for macOS and mobile versions from the Play Store or App Store for Android and iOS.
Basically, OneNote for Windows 10 is optimized for handheld devices so has a less cluttered interface, whereas OneNote 2016 is specifically designed for desktop. If you’re using OneNote for more extensive work or for collaboration on a team, the desktop version has a lot more to offer. That’s why I use OneNote 2016 and recommend it to all of our customers.
Also: Microsoft announced in November 2019 that OneNote 2016 Desktop version will not be going away. This means continued support for OneNote 2016 beyond October 2020. Read news here
Let’s take a look at how OneNote’s interface works. I mentioned earlier that it’s basically a virtual filing cabinet, so let’s think about how you organize a filing cabinet. Your drawers are filled with folders that have some sort of relevance to each other. Those folders have pages. It’s the same premise for OneNote except your drawers are called notebooks, your folders are sections and your information within the folders are your pages.
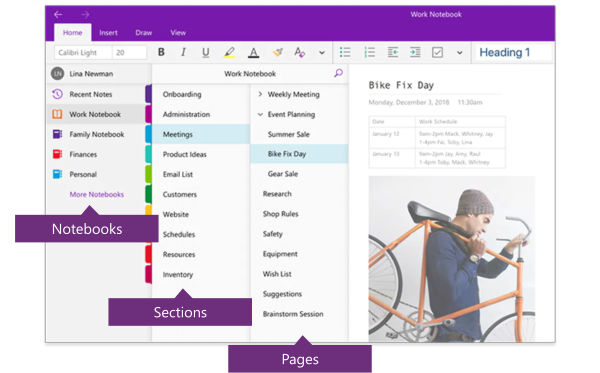
- Notebooks are the main files for OneNote that hold all pieces inside. You may create separate notebooks for items like Work, School, or Home.
- Sections are the dividers in the notebooks and the next levels in the hierarchy. You might label them like in a College notebook as Chemistry, Psychology, and Math for each of your classes.
- Pages are within the sections as the notes, lists, and planners. Using College as an example again, your Psychology section may include pages.
You can also add additional categories such as section grouping and sub-pages to create more defined organisation which we will get into in a bit.
OneNote allows you to type, write, record or insert any content you want. Here are some examples of content you may want to add to your notes:

Ok, It’s all well and good to know what sort of information you can store in OneNote, but how can we bring it all together into something productive? It all comes down to how you want to use OneNote. I believe there are three ways people use OneNote – For business or personal use or both. I am the latter.
Here are some examples of what I use OneNote for:
- My Business – Auscomp OneNote Templates
- Project management
- To-do-lists
- Research
- Knowledge storage
- Information storing & sharing
- Ideas
- Due diligence
So now you know the basics of what OneNote has to offer, let’s dive into how we can make all our notes more organised so you can be as productive as a professional.
Organizing Your OneNote: (For Maximum Productivity)
There are so many things you can do with, and store within OneNote that it can be really easy to have a confusing mess of information if your notes aren’t organized properly, that’s why it’s very important to set up a good system early on. The trick is to keep track of all the clutter that can accumulate, and save yourself a lot of time!
Templates:
Templates are essential to proper organisation within your notes. Instead of aimlessly writing in blank space, you can create your own, or download free or paid templates specifically designed to help structure and hint at what you should be adding to whatever you’re working on.
You can look up tutorials on how to make them yourself, or save some time by downloading them. Microsoft offers some basic free templates natively on OneNote or you can download professional ones elsewhere, In fact, you can get professional quality Templates right here on this page. Browse some of our FREE or professional templates designed to make work or home tasks easier.

Color Coding:

You can make your notes visually organised by assigning colors to specific notebooks and sections. OneNote does this automatically but you can change the color yourself.
Notebooks: Right-click on the desired notebook and select “properties.” Here you can change the color, name or location of the notebook.
Sections: Right-click on the section you want changed, select “Section Color”.
Sub-pages:
In each section, you can write as many pages as you want, but what you may not know is that you can turn pages into sub-pages that are like bullet points under a core topic. Again, this works similarly to grouping sections in bringing together similar information. To create a sub-page, Right-click on your desired page and click “create sub-page.”
Grouping sections:
Within a notebook there are numerous sections, you can actually group specific sections together if they are relevant to each other, for example, the year or semester if you’re still in college – right-click on “Tab” and select “new section group”, then drag and drop the sections you want in it.
Moving your notes:
You can move any notebook, section or page to order them in a way that makes sense to you. It’s very easy to do, just drag and drop to where you want it.
Linking notes:
Another convenient organizational feature is linking notebooks, sections, and pages – even specific paragraphs to each other within OneNote to create your own wiki-style information storage. Right-click on what you want to create a link for and choose “Copy Link To”, then paste the link on the page you want to add it.
Deleting Notes:
Because I literally put every thought into OneNote, my notes can get very difficult to categorize so I find that deleting notes I don’t find value in or need declutters my workspace. If you don’t delete pages you don’t need anymore they can build up quickly. It’s a good habit to get into especially since you can easily get them back by hitting “File” > “Info” > open “Backups”.

Searching:

This one is a no brainer and SOOO helpful. Anytime I want to find a specific note or literally anything I wrote on a page, I search for a keyword and the search bar will find it for me. It can even find embedded documents or text in images.
Tips and Tricks
As promised here are some of my favorite, most useful tips on Microsoft’s OneNote. Some of these are purely cosmetic, others can actually be really useful to save time and make tasks easier.
Keyboard shortcuts:
There are heaps of shortcuts that speed up the processes of taking and formatting notes, organizing and managing notebooks and sharing or protecting them. You can view the whole list here
Personally, the ones I use most and recommend you to try are:
- CTRL+A (Selects all text on a page)
- CTRL+C&V (Copy and Paste)
- CTRL+E (Searching for specific words or notes)
- Windows Logo Key+Shift+S (Screen clipping)
- CTRL+N (New Page)
Math calculations:
Write or type any equation with an equals sign, press Enter or the spacebar on your keyboard, and OneNote will automatically calculate the result. For harder equations, you’ll want to click the “Draw” tab and select the Lasso tool and draw a circle around the equation. You can then click again on the “Draw” tab and choose “Ink to Math”. When done, you can select an action to solve or graph. Solving will give you a step by step solution, and graphing will give you an option to insert it on the page for examination or inking.
Copy text from images:
If you’re using the desktop version of OneNote, open the section of your notebook that contains an image. To copy the text from the image, right-click the image, then click the Copy Text from Picture option. The text from your image will save to your clipboard.


Audio notes and dictation:
To make an audio recording, go to OneNote’s main menu and select “Insert” > “Record Audio”
To dictate, click the “Dictate” button on the Home Ribbon to dictate. Click it again to stop. Click the Down arrow to see other languages for dictation
Handwriting/ drawing:
If you have a touch-screen device you can use your finger or a smart pen for handwriting notes, marking up documents, or adding a splash of color. To do so, select the “Draw” tab. In the “Tools” group, choose a pen or highlighter, and then draw on the screen. You can easily change how it looks by changing the color or thickness. To stop drawing, click the Type button on the Draw tab.
Ink to text:
To convert handwriting to text in OneNote, first select the note that you want to convert. Then click the “Draw” tab in the Ribbon. Then click the “Ink to Text” button. OneNote will then convert the handwriting in the note to typed text. You can also convert ink to math.


Password protect sections:
Select the Review tab in OneNote and click or tap the Password button. The Password Protection pane appears at the right side of the window.
Select the Set Password button. The Password Protection window appears.
Enter a password in the two fields on the Password Protection window and click or tap OK.
Customize look (dark mode and default font):

Windows
Dark mode (OneNote 2016)
Click “File” > “Options.” In the OneNote “Options” dialogue box, click the “General” tab. From the Office Themes drop-down, select “Black”.
Dark mode (OneNote for Windows 10)
- In the upper right corner of the app window, click the Settings and More button Settings and More button in OneNote, click Settings, and then click Options.
- In the Options pane that opens, under Color, do one of the following:
- Select Dark to use OneNote in Dark Mode
Font
Choose “File” > “Options.”
In the OneNote Options dialogue box, under “Default font”, select the Font, Size, and Font Color you want OneNote to use, and click “OK”.
macOS + iOS
Dark mode (OneNote 2016)
Click “File” > “Options.” In the OneNote “Options” dialogue box, click the “General” tab. From the Office Themes drop-down, select “Black”.
Dark Mode (OneNote)
OneNote inherits its appearance from your Mac’s system preferences. To use Dark Mode with OneNote, your Mac must be running macOS Mojave (Version 10.14) or later.
Font
Choose “File” > “Options.”
In the OneNote Options dialogue box, under “Default font”, select the Font, Size, and Font Color you want OneNote to use, and click “OK”.
Web clipper: (saving webpages content – researcher)
OneNote Web Clipper lets you quickly clip all or part of a web page to OneNote, and save it for later. Clip images, PDF’s, videos, or a visual bookmark of a page. Best of all, you can access them from any computer, tablet, or phone – even when you’re offline https://www.onenote.com/clipper

To get started you can review our collection of Free & PRO Templates here.